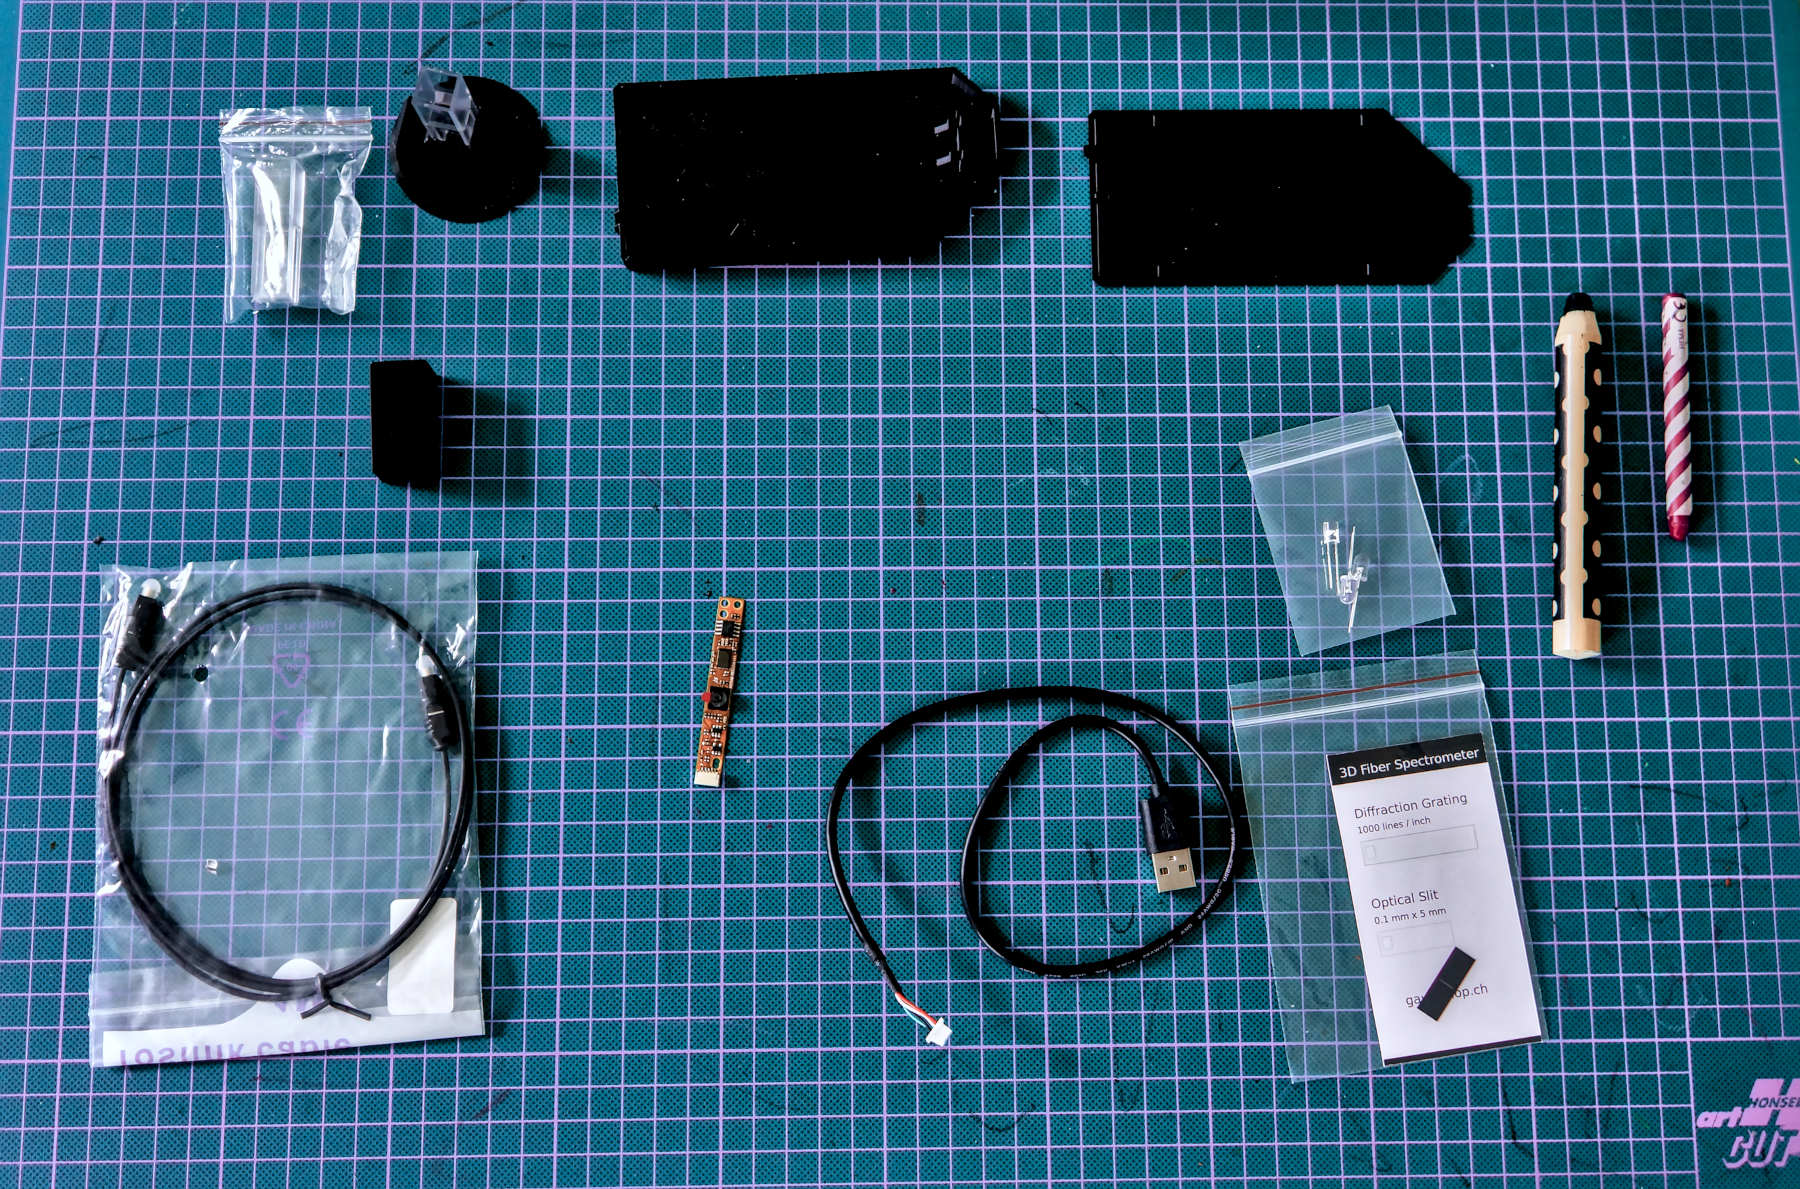
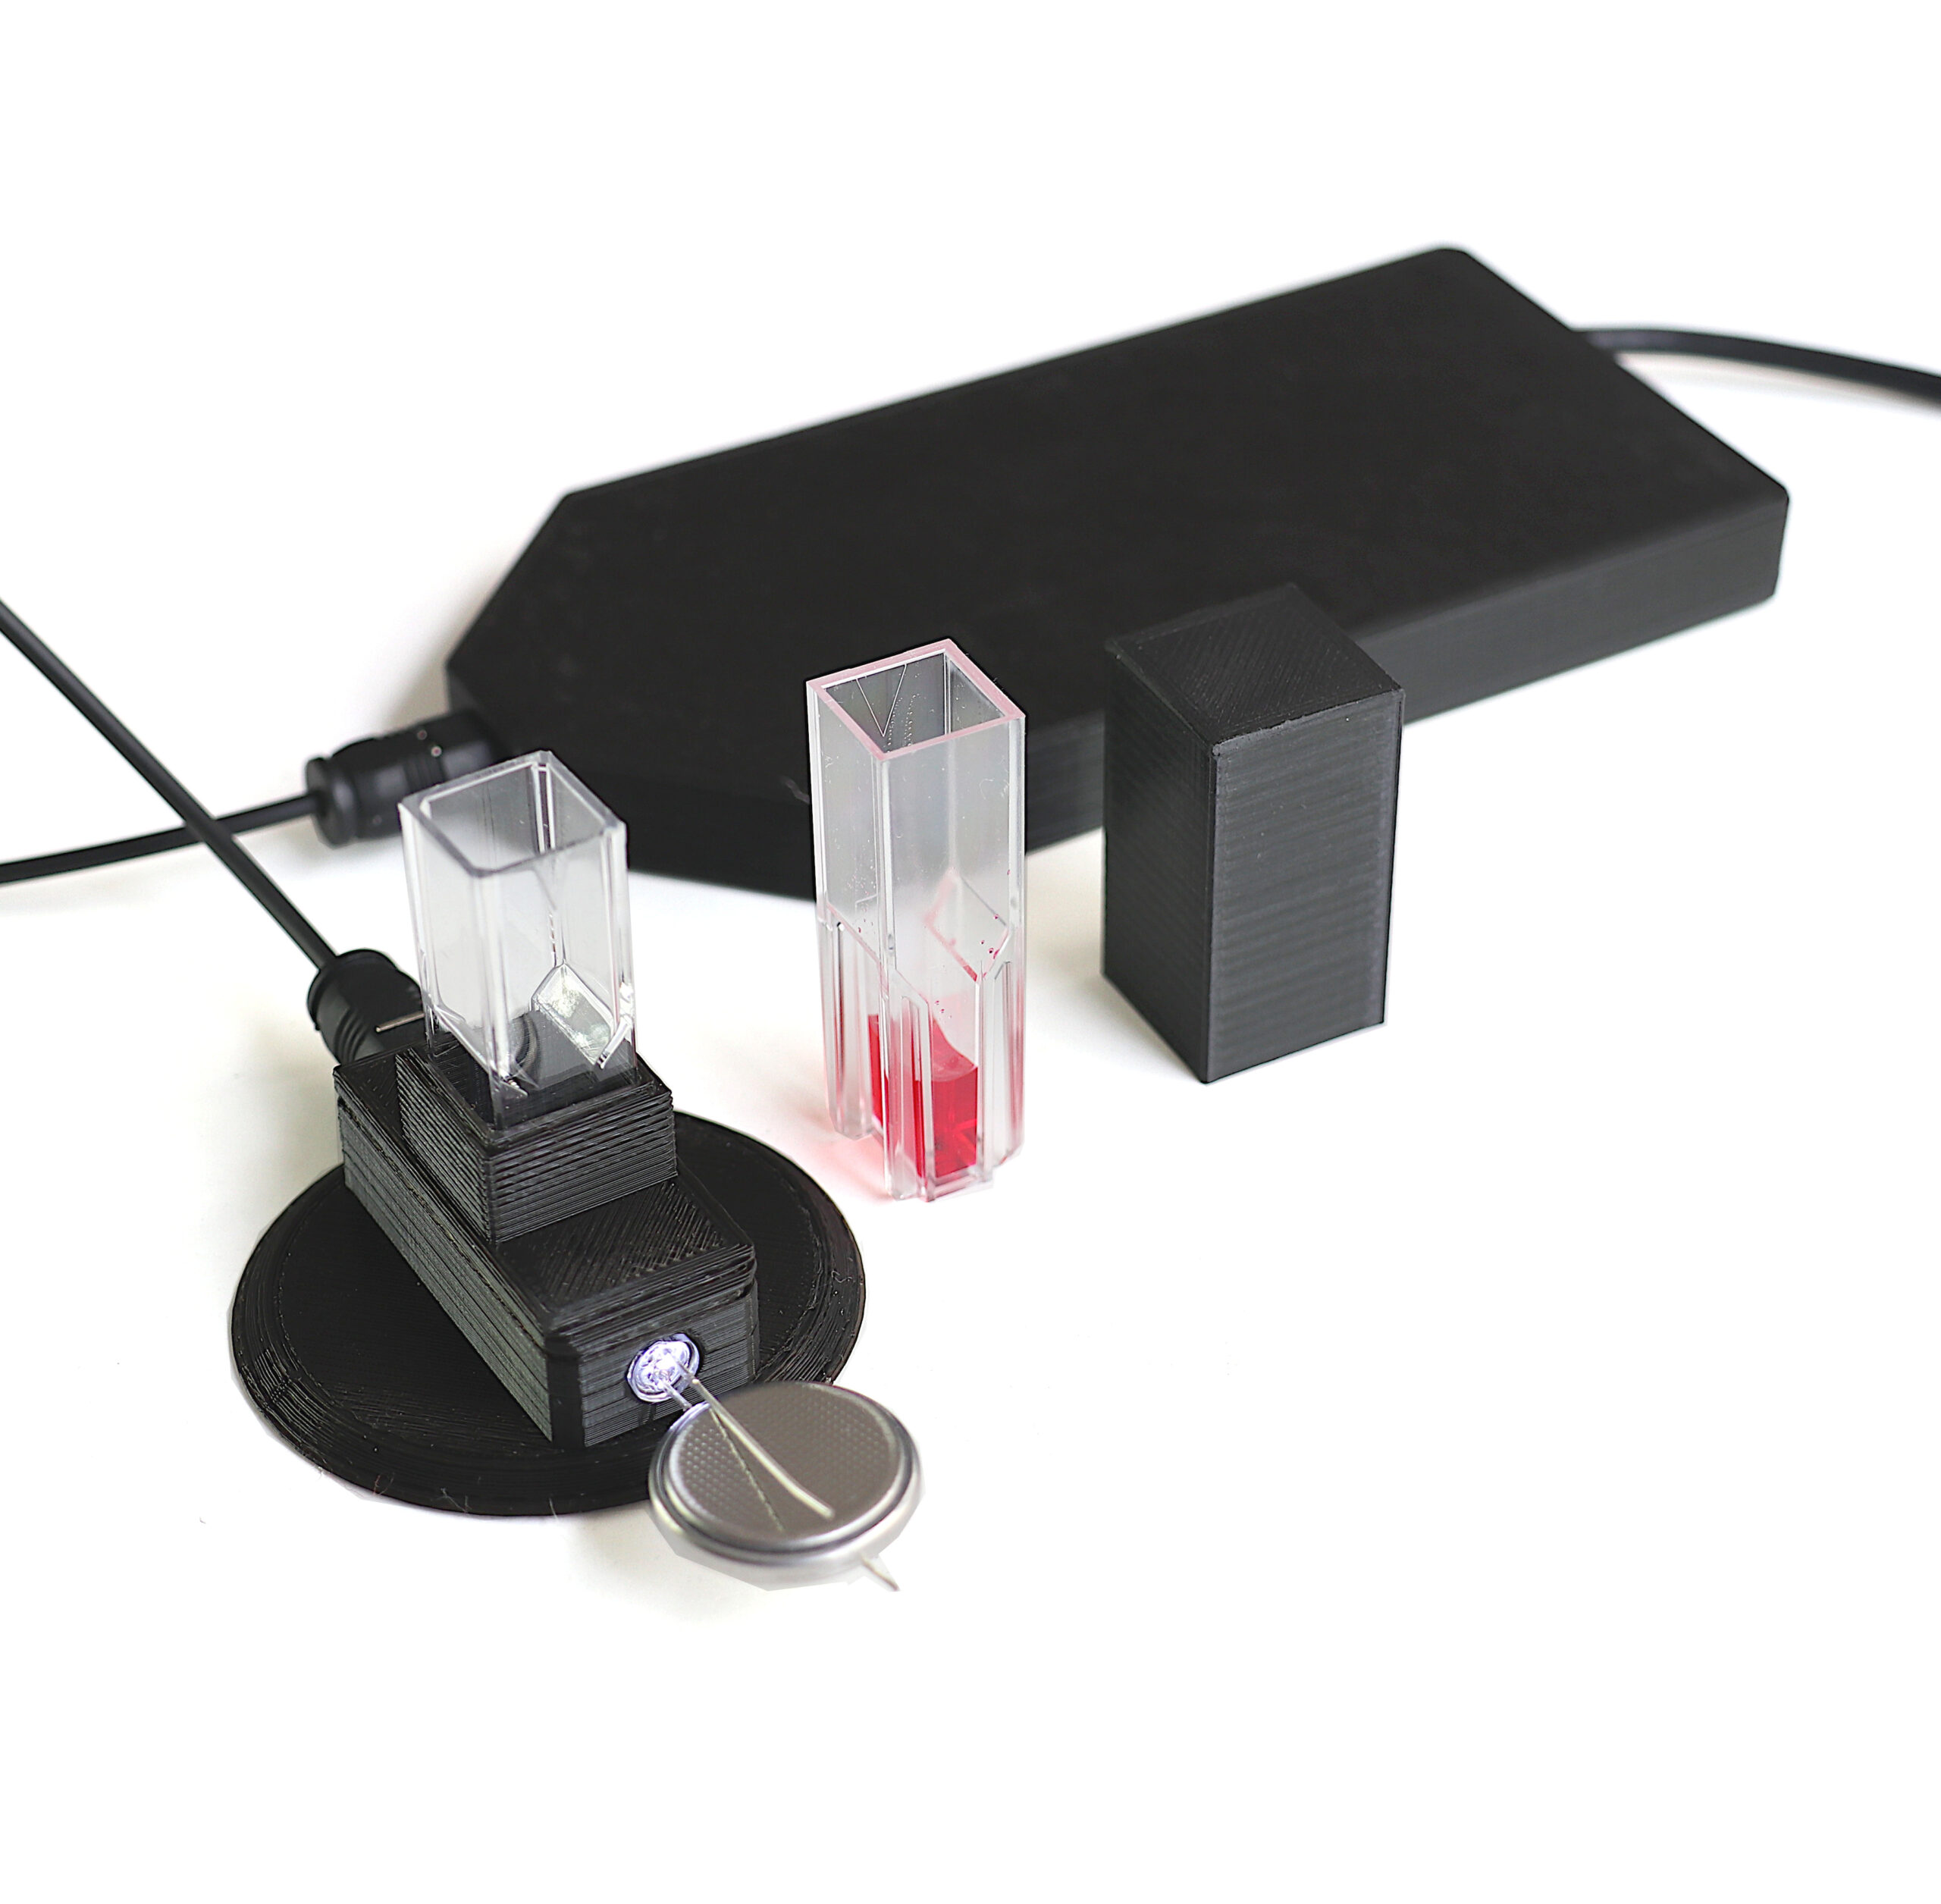
We use distilled water to clean a wide range of investigative equipment. We also use it in Bioassay with seeds and here to test the calibration of our spectrometer before analyzing water samples.
To mitigate this problem on data we need to change the calibration by aligning our spectrum image: adjust the sampling yellow bar location.
If you’ve collected a spectrum image with the blue peaks to the right side, and the red to the left, it’s the reverse of what Spectral Workbench expects. The easiest and best thing to do is to flip your webcam inside your spectrometer! Public Lab kits are all designed to be correctly oriented, however, so this should only affect custom built spectrometers.
However, you can calibrate a reversed spectrum, and Spectral Workbench will then flip your image back to align with your graph. This should resolve the issue, and copy into other spectra correctly.
We need to fine tune the calibration in specific wavelength. It’s necessary for obtaining a accurate output in result plot. It’s the Copy calibration process.
Many other spectra on the site have a scale showing nanometer (nm) or nanometer units on the horizontal axis. To get scaled data, you must calibrate your spectrometer. There are several kinds of calibration but here we’re talking about wavelength calibration, which allows your spectrometer to display a wavelength value for any color of light it sees.
Once you’ve calibrated a single spectrum, you’ll be able to apply that calibration to all of the spectra you collected with that instrument. Since both images are the same size, Spectral Workbench will copy over the wavelength position of each pixel from the calibration image to the new image, and your spectrum will then be calibrated.
For now we didn’t yet find a way for calbirating pixels. In addition we suspect that our light source is too strong in the current configuration so this distorts our output data curve.
And also spectral-workbench.js doesn’t seem to allow data download.
Json data
[[6,2,0,2.6666666666666665],[6,2,0,2.6666666666666665],[6,2,0,2.6666666666666665],[7,4,0,3.6666666666666665],[8,5,0,4.333333333333333],[8,5,0,4.333333333333333],[8,5,0,4.333333333333333],[7,4,0,3.6666666666666665],[7,4,0,3.6666666666666665],[7,4,0,3.6666666666666665],[7,4,0,3.6666666666666665],[7,4,0,3.6666666666666665],[7,4,0,3.6666666666666665],[7,4,0,3.6666666666666665],[5,4,0,3],[4,3,0,2.3333333333333335],[3,2,0,1.6666666666666667],[3,2,0,1.6666666666666667],[3,2,0,1.6666666666666667],[3,2,0,1.6666666666666667],[3,2,0,1.6666666666666667],[4,3,0,2.3333333333333335],[4,3,0,2.3333333333333335],[4,3,0,2.3333333333333335],[4,3,0,2.3333333333333335],[4,3,0,2.3333333333333335],[4,3,0,2.3333333333333335],[5,4,0,3],[4,3,0,2.3333333333333335],[4,3,0,2.3333333333333335],[4,3,0,2.3333333333333335],[4,3,0,2.3333333333333335],[4,3,0,2.3333333333333335],[4,3,0,2.3333333333333335],[4,3,0,2.3333333333333335],[5,4,0,3],[5,4,0,3],[5,4,0,3],[4,3,0,2.3333333333333335],[4,3,0,2.3333333333333335],[4,3,0,2.3333333333333335],[4,3,0,2.3333333333333335],[4,3,0,2.3333333333333335],[4,3,0,2.3333333333333335],[6,2,0,2.6666666666666665],[6,2,0,2.6666666666666665],[6,2,0,2.6666666666666665],[6,2,0,2.6666666666666665],[4,3,0,2.3333333333333335],[4,3,0,2.3333333333333335],[4,3,0,2.3333333333333335],[4,3,0,2.3333333333333335],[5,4,0,3],[6,5,0,3.6666666666666665],[5,4,0,3],[4,3,0,2.3333333333333335],[6,2,0,2.6666666666666665],[6,2,0,2.6666666666666665],[6,2,0,2.6666666666666665],[6,2,0,2.6666666666666665],[6,2,0,2.6666666666666665],[6,2,0,2.6666666666666665],[4,3,0,2.3333333333333335],[3,2,0,1.6666666666666667],[4,3,0,2.3333333333333335],[4,3,0,2.3333333333333335],[5,4,0,3],[5,4,0,3],[4,3,0,2.3333333333333335],[4,3,0,2.3333333333333335],[4,3,0,2.3333333333333335],[4,3,0,2.3333333333333335],[4,3,0,2.3333333333333335],[4,3,0,2.3333333333333335],[4,3,0,2.3333333333333335],[4,3,0,2.3333333333333335],[4,3,0,2.3333333333333335],[4,3,0,2.3333333333333335],[4,3,0,2.3333333333333335],[4,3,0,2.3333333333333335],[4,3,0,2.3333333333333335],[4,3,0,2.3333333333333335],[4,3,0,2.3333333333333335],[4,3,0,2.3333333333333335],[4,3,0,2.3333333333333335],[4,3,0,2.3333333333333335],[6,2,0,2.6666666666666665],[7,3,0,3.3333333333333335],[6,2,0,2.6666666666666665],[6,2,0,2.6666666666666665],[6,2,0,2.6666666666666665],[6,2,0,2.6666666666666665],[4,3,0,2.3333333333333335],[4,3,0,2.3333333333333335],[4,3,0,2.3333333333333335],[4,3,0,2.3333333333333335],[4,3,0,2.3333333333333335],[4,3,0,2.3333333333333335],[4,3,0,2.3333333333333335],[5,4,0,3],[4,4,3,3.6666666666666665],[4,4,3,3.6666666666666665],[3,5,10,6],[3,5,10,6],[3,5,20,9.333333333333334],[4,6,21,10.333333333333334],[3,7,41,17],[6,9,43,19.333333333333332],[5,10,64,26.333333333333332],[7,12,66,28.333333333333332],[6,14,92,37.333333333333336],[13,20,99,44],[12,25,140,59],[16,30,144,63.333333333333336],[13,34,171,72.66666666666667],[19,40,177,78.66666666666667],[21,50,211,94],[27,55,217,99.66666666666667],[20,65,239,108],[26,70,245,113.66666666666667],[17,82,242,113.66666666666667],[28,93,250,123.66666666666667],[34,118,250,134],[31,115,250,132],[30,128,250,136],[42,140,250,144],[40,145,250,145],[45,150,250,148.33333333333334],[43,154,250,149],[43,154,250,149],[39,156,249,148],[39,156,249,148],[36,158,249,147.66666666666666],[33,154,246,144.33333333333334],[17,154,245,138.66666666666666],[13,151,242,135.33333333333334],[8,149,243,133.33333333333334],[3,144,238,128.33333333333334],[3,141,240,128],[3,141,240,128],[3,137,244,128],[3,134,242,126.33333333333333],[3,131,243,125.66666666666667],[3,128,239,123.33333333333333],[3,122,243,122.66666666666667],[3,119,239,120.33333333333333],[3,112,240,118.33333333333333],[3,111,239,117.66666666666667],[3,105,237,115],[3,102,235,113.33333333333333],[3,96,217,105.33333333333333],[3,91,212,102],[3,87,190,93.33333333333333],[3,84,187,91.33333333333333],[3,79,172,84.66666666666667],[3,76,168,82.33333333333333],[3,72,158,77.66666666666667],[3,70,156,76.33333333333333],[3,66,145,71.33333333333333],[3,66,145,71.33333333333333],[3,66,135,68],[3,65,134,67.33333333333333],[3,64,123,63.333333333333336],[3,62,122,62.333333333333336],[3,60,114,59],[3,60,114,59],[3,61,113,59],[4,64,115,61],[5,65,114,61.333333333333336],[7,67,117,63.666666666666664],[7,73,116,65.33333333333333],[10,76,118,68],[9,80,117,68.66666666666667],[10,82,118,70],[9,87,114,70],[15,93,120,76],[18,109,120,82.33333333333333],[19,110,122,83.66666666666667],[17,122,117,85.33333333333333],[22,128,123,91],[15,138,112,88.33333333333333],[19,141,115,91.66666666666667],[13,151,101,88.33333333333333],[15,153,104,90.66666666666667],[11,164,89,88],[12,165,90,89],[11,174,82,89],[12,175,83,90],[9,183,69,87],[12,185,72,89.66666666666667],[11,192,58,87],[11,192,58,87],[6,199,34,79.66666666666667],[7,200,35,80.66666666666667],[6,204,19,76.33333333333333],[6,204,19,76.33333333333333],[4,207,7,72.66666666666667],[6,210,10,75.33333333333333],[8,216,5,76.33333333333333],[11,218,7,78.66666666666667],[10,223,4,79],[11,224,5,80],[7,225,2,78],[5,224,1,76.66666666666667],[4,223,0,75.66666666666667],[4,223,0,75.66666666666667],[4,225,0,76.33333333333333],[6,227,1,78],[6,227,1,78],[5,226,0,77],[3,224,0,75.66666666666667],[3,223,0,75.33333333333333],[3,221,0,74.66666666666667],[3,220,0,74.33333333333333],[3,218,0,73.66666666666667],[3,219,0,74],[5,221,0,75.33333333333333],[4,220,0,74.66666666666667],[3,218,0,73.66666666666667],[3,218,0,73.66666666666667],[3,217,0,73.33333333333333],[3,214,0,72.33333333333333],[3,213,0,72],[3,212,0,71.66666666666667],[3,208,0,70.33333333333333],[3,207,0,70],[3,204,0,69],[3,202,0,68.33333333333333],[3,199,0,67.33333333333333],[3,198,0,67],[3,195,0,66],[3,193,0,65.33333333333333],[3,189,0,64],[3,186,0,63],[3,184,0,62.333333333333336],[3,183,0,62],[3,177,0,60],[3,174,0,59],[3,165,0,56],[3,168,0,57],[25,161,0,62],[29,165,1,65],[67,156,2,75],[74,163,9,82],[128,146,6,93.33333333333333],[128,146,6,93.33333333333333],[163,127,1,97],[161,125,0,95.33333333333333],[186,109,0,98.33333333333333],[182,105,0,95.66666666666667],[196,92,0,96],[194,90,0,94.66666666666667],[207,81,0,96],[206,80,0,95.33333333333333],[213,72,0,95],[210,68,0,92.66666666666667],[216,59,0,91.66666666666667],[212,55,0,89],[214,47,0,87],[210,42,0,84],[212,34,0,82],[210,31,0,80.33333333333333],[212,27,0,79.66666666666667],[211,24,0,78.33333333333333],[211,18,0,76.33333333333333],[208,15,0,74.33333333333333],[207,11,0,72.66666666666667],[206,9,0,71.66666666666667],[202,7,0,69.66666666666667],[199,4,0,67.66666666666667],[191,5,0,65.33333333333333],[188,2,0,63.333333333333336],[182,3,0,61.666666666666664],[181,2,0,61],[175,2,0,59],[174,2,0,58.666666666666664],[167,3,0,56.666666666666664],[164,2,0,55.333333333333336],[160,2,0,54],[157,2,0,53],[152,2,0,51.333333333333336],[152,2,0,51.333333333333336],[149,3,0,50.666666666666664],[149,3,0,50.666666666666664],[148,3,0,50.333333333333336],[148,3,0,50.333333333333336],[146,4,0,50],[146,4,0,50],[145,3,0,49.333333333333336],[145,3,0,49.333333333333336],[142,2,0,48],[142,2,0,48],[139,2,0,47],[139,2,0,47],[135,2,0,45.666666666666664],[135,2,0,45.666666666666664],[129,3,0,44],[127,2,0,43],[121,2,0,41],[120,2,0,40.666666666666664],[114,2,0,38.666666666666664],[113,2,0,38.333333333333336],[109,2,0,37],[108,2,0,36.666666666666664],[101,2,0,34.333333333333336],[99,2,0,33.666666666666664],[95,2,0,32.333333333333336],[95,2,0,32.333333333333336],[90,3,0,31],[89,2,0,30.333333333333332],[85,2,0,29],[84,2,0,28.666666666666668],[75,2,0,25.666666666666668],[73,2,0,25],[62,2,0,21.333333333333332],[61,2,0,21],[52,2,0,18],[51,2,0,17.666666666666668],[46,2,0,16],[46,2,0,16],[40,3,0,14.333333333333334],[40,3,0,14.333333333333334],[40,3,0,14.333333333333334],[40,3,0,14.333333333333334],[40,3,0,14.333333333333334],[40,3,0,14.333333333333334],[40,3,0,14.333333333333334],[39,2,0,13.666666666666666],[36,3,0,13],[35,2,0,12.333333333333334],[29,3,0,10.666666666666666],[28,2,0,10],[26,2,0,9.333333333333334],[26,2,0,9.333333333333334],[22,2,0,8],[22,2,0,8],[19,2,0,7],[19,2,0,7],[17,3,0,6.666666666666667],[17,3,0,6.666666666666667],[16,3,0,6.333333333333333],[14,2,0,5.333333333333333],[13,3,0,5.333333333333333],[13,3,0,5.333333333333333],[13,3,0,5.333333333333333],[13,3,0,5.333333333333333],[10,2,0,4],[10,2,0,4],[10,2,0,4],[10,2,0,4],[10,2,0,4],[10,2,0,4],[9,3,0,4],[10,4,0,4.666666666666667],[10,4,0,4.666666666666667],[10,4,0,4.666666666666667],[7,4,0,3.6666666666666665],[7,4,0,3.6666666666666665],[7,4,0,3.6666666666666665],[6,2,0,2.6666666666666665],[6,2,0,2.6666666666666665],[6,2,0,2.6666666666666665],[6,2,0,2.6666666666666665],[6,2,0,2.6666666666666665],[6,2,0,2.6666666666666665],[6,2,0,2.6666666666666665],[6,2,0,2.6666666666666665],[6,2,0,2.6666666666666665],[6,2,0,2.6666666666666665],[6,2,0,2.6666666666666665],[5,2,0,2.3333333333333335],[5,2,0,2.3333333333333335],[6,2,0,2.6666666666666665],[5,2,0,2.3333333333333335],[4,3,0,2.3333333333333335],[3,2,0,1.6666666666666667],[3,2,0,1.6666666666666667],[4,3,0,2.3333333333333335],[4,3,0,2.3333333333333335],[3,2,0,1.6666666666666667],[3,2,0,1.6666666666666667],[3,2,0,1.6666666666666667],[3,2,0,1.6666666666666667],[3,2,0,1.6666666666666667],[3,2,0,1.6666666666666667],[4,3,0,2.3333333333333335],[4,3,0,2.3333333333333335],[4,3,0,2.3333333333333335],[3,2,0,1.6666666666666667],[3,2,0,1.6666666666666667],[3,2,0,1.6666666666666667],[3,2,0,1.6666666666666667],[3,2,0,1.6666666666666667],[3,2,0,1.6666666666666667],[3,2,0,1.6666666666666667],[3,2,0,1.6666666666666667],[3,2,0,1.6666666666666667],[3,2,0,1.6666666666666667],[3,2,0,1.6666666666666667],[3,2,0,1.6666666666666667],[3,2,0,1.6666666666666667],[3,2,0,1.6666666666666667],[3,2,0,1.6666666666666667],[3,2,0,1.6666666666666667],[3,2,0,1.6666666666666667],[3,2,0,1.6666666666666667],[3,2,0,1.6666666666666667],[3,2,0,1.6666666666666667],[3,2,0,1.6666666666666667],[3,2,0,1.6666666666666667],[4,3,0,2.3333333333333335],[4,3,0,2.3333333333333335],[6,2,0,2.6666666666666665],[6,2,0,2.6666666666666665],[6,2,0,2.6666666666666665],[6,2,0,2.6666666666666665],[4,3,0,2.3333333333333335],[4,3,0,2.3333333333333335],[4,3,0,2.3333333333333335],[4,3,0,2.3333333333333335],[4,3,0,2.3333333333333335],[4,3,0,2.3333333333333335],[4,3,0,2.3333333333333335],[4,3,0,2.3333333333333335],[4,3,0,2.3333333333333335],[4,3,0,2.3333333333333335],[4,3,0,2.3333333333333335],[3,2,0,1.6666666666666667],[3,2,0,1.6666666666666667],[3,2,0,1.6666666666666667],[3,2,0,1.6666666666666667],[3,2,0,1.6666666666666667],[3,2,0,1.6666666666666667],[3,2,0,1.6666666666666667],[3,2,0,1.6666666666666667],[3,2,0,1.6666666666666667],[3,2,0,1.6666666666666667],[3,2,0,1.6666666666666667],[3,2,0,1.6666666666666667],[3,2,0,1.6666666666666667],[3,2,0,1.6666666666666667],[3,2,0,1.6666666666666667],[3,2,0,1.6666666666666667],[3,2,0,1.6666666666666667],[3,2,0,1.6666666666666667],[3,2,0,1.6666666666666667],[3,2,0,1.6666666666666667],[3,2,0,1.6666666666666667],[3,2,0,1.6666666666666667],[3,2,0,1.6666666666666667],[3,2,0,1.6666666666666667],[3,2,0,1.6666666666666667],[3,2,0,1.6666666666666667],[3,2,0,1.6666666666666667],[3,2,0,1.6666666666666667],[3,2,0,1.6666666666666667],[3,2,0,1.6666666666666667],[3,2,0,1.6666666666666667],[3,2,0,1.6666666666666667],[3,2,0,1.6666666666666667],[3,2,0,1.6666666666666667],[3,2,0,1.6666666666666667],[3,2,0,1.6666666666666667],[3,2,0,1.6666666666666667],[3,2,0,1.6666666666666667],[3,2,0,1.6666666666666667],[4,3,0,2.3333333333333335],[4,3,0,2.3333333333333335],[4,3,0,2.3333333333333335],[4,3,0,2.3333333333333335],[4,3,0,2.3333333333333335],[4,3,0,2.3333333333333335],[3,2,0,1.6666666666666667],[3,2,0,1.6666666666666667],[3,2,0,1.6666666666666667],[3,2,0,1.6666666666666667],[3,2,0,1.6666666666666667],[3,2,0,1.6666666666666667],[3,2,0,1.6666666666666667],[3,2,0,1.6666666666666667],[3,2,0,1.6666666666666667],[3,2,0,1.6666666666666667],[3,2,0,1.6666666666666667],[3,2,0,1.6666666666666667],[3,2,0,1.6666666666666667],[3,2,0,1.6666666666666667],[4,3,0,2.3333333333333335],[4,3,0,2.3333333333333335],[4,3,0,2.3333333333333335],[3,2,0,1.6666666666666667],[3,2,0,1.6666666666666667],[4,3,0,2.3333333333333335],[4,3,0,2.3333333333333335],[4,3,0,2.3333333333333335],[4,3,0,2.3333333333333335],[4,3,0,2.3333333333333335],[3,3,0,2],[3,3,0,2],[4,4,3,3.6666666666666665],[4,4,3,3.6666666666666665],[5,5,6,5.333333333333333],[5,5,6,5.333333333333333],[4,4,5,4.333333333333333],[4,4,5,4.333333333333333],[4,3,7,4.666666666666667],[4,3,7,4.666666666666667],[3,5,10,6],[3,5,10,6],[3,4,14,7],[4,5,16,8.333333333333334],[4,4,20,9.333333333333334],[4,4,20,9.333333333333334],[4,6,25,11.666666666666666],[4,6,25,11.666666666666666],[4,6,32,14],[4,6,32,14],[3,8,41,17.333333333333332],[3,8,41,17.333333333333332],[3,8,48,19.666666666666668],[4,9,49,20.666666666666668],[3,10,57,23.333333333333332],[3,10,57,23.333333333333332],[3,9,59,23.666666666666668],[3,9,59,23.666666666666668],[3,10,57,23.333333333333332],[3,10,57,23.333333333333332],[3,10,55,22.666666666666668],[3,10,55,22.666666666666668],[3,10,55,22.666666666666668],[3,9,53,21.666666666666668],[3,9,51,21],[3,9,51,21],[3,8,48,19.666666666666668],[3,7,47,19],[3,7,43,17.666666666666668],[3,7,43,17.666666666666668],[3,8,39,16.666666666666668],[3,7,38,16],[3,6,31,13.333333333333334],[3,6,31,13.333333333333334],[3,6,27,12],[4,7,28,13],[4,8,26,12.666666666666666],[4,8,26,12.666666666666666],[4,6,21,10.333333333333334],[3,5,20,9.333333333333334],[3,6,18,9],[3,4,16,7.666666666666667],[3,4,14,7],[3,4,14,7],[4,6,14,8],[4,6,14,8],[4,6,10,6.666666666666667],[4,6,10,6.666666666666667],[3,6,6,5],[3,6,6,5],[3,6,6,5],[3,6,6,5],[7,7,7,7],[6,6,6,6],[5,5,4,4.666666666666667],[4,4,3,3.6666666666666665],[4,4,3,3.6666666666666665],[4,4,3,3.6666666666666665],[5,4,1,3.3333333333333335],[5,4,1,3.3333333333333335],[5,4,0,3],[5,4,0,3],[5,4,0,3],[5,4,0,3],[4,3,0,2.3333333333333335],[4,3,0,2.3333333333333335],[5,4,0,3],[5,4,0,3],[5,4,0,3],[5,4,0,3],[4,3,0,2.3333333333333335],[4,3,0,2.3333333333333335],[4,3,0,2.3333333333333335],[4,3,0,2.3333333333333335],[4,3,0,2.3333333333333335],[4,3,0,2.3333333333333335],[5,4,0,3],[4,3,0,2.3333333333333335],[4,3,0,2.3333333333333335],[4,3,0,2.3333333333333335],[4,3,0,2.3333333333333335],[4,3,0,2.3333333333333335],[4,3,0,2.3333333333333335],[5,4,0,3],[5,4,0,3],[4,3,0,2.3333333333333335],[4,3,0,2.3333333333333335],[4,3,0,2.3333333333333335],[4,3,0,2.3333333333333335],[4,3,0,2.3333333333333335],[4,3,0,2.3333333333333335],[4,3,0,2.3333333333333335],[4,3,0,2.3333333333333335],[4,3,0,2.3333333333333335],[4,3,0,2.3333333333333335],[4,3,0,2.3333333333333335],[4,3,0,2.3333333333333335],[4,3,0,2.3333333333333335],[4,3,0,2.3333333333333335],[4,3,0,2.3333333333333335],[4,3,0,2.3333333333333335],[4,3,0,2.3333333333333335],[5,4,0,3],[5,4,0,3],[5,4,0,3],[4,3,0,2.3333333333333335],[5,4,0,3],[5,4,0,3],[5,4,0,3],[5,4,0,3],[6,2,0,2.6666666666666665],[6,2,0,2.6666666666666665],[4,3,0,2.3333333333333335],[4,3,0,2.3333333333333335],[4,3,0,2.3333333333333335],[4,3,0,2.3333333333333335],[5,4,0,3],[5,4,0,3],[5,4,0,3],[5,4,0,3],[5,4,0,3],[5,4,0,3],[5,4,0,3],[5,4,0,3],[5,4,0,3],[6,5,0,3.6666666666666665],[6,5,0,3.6666666666666665],[6,5,0,3.6666666666666665],[5,4,0,3],[5,4,0,3],[5,4,0,3],[5,4,0,3],[5,4,0,3],[6,5,0,3.6666666666666665]]


